> ## Documentation Index
> Fetch the complete documentation index at: https://docs.glood.ai/llms.txt
> Use this file to discover all available pages before exploring further.
# How to create Trending section
The Trending section showcases products that are currently popular among shoppers. This feature helps highlight in-demand items and can drive sales by leveraging social proof and creating urgency.
## Implementation Steps
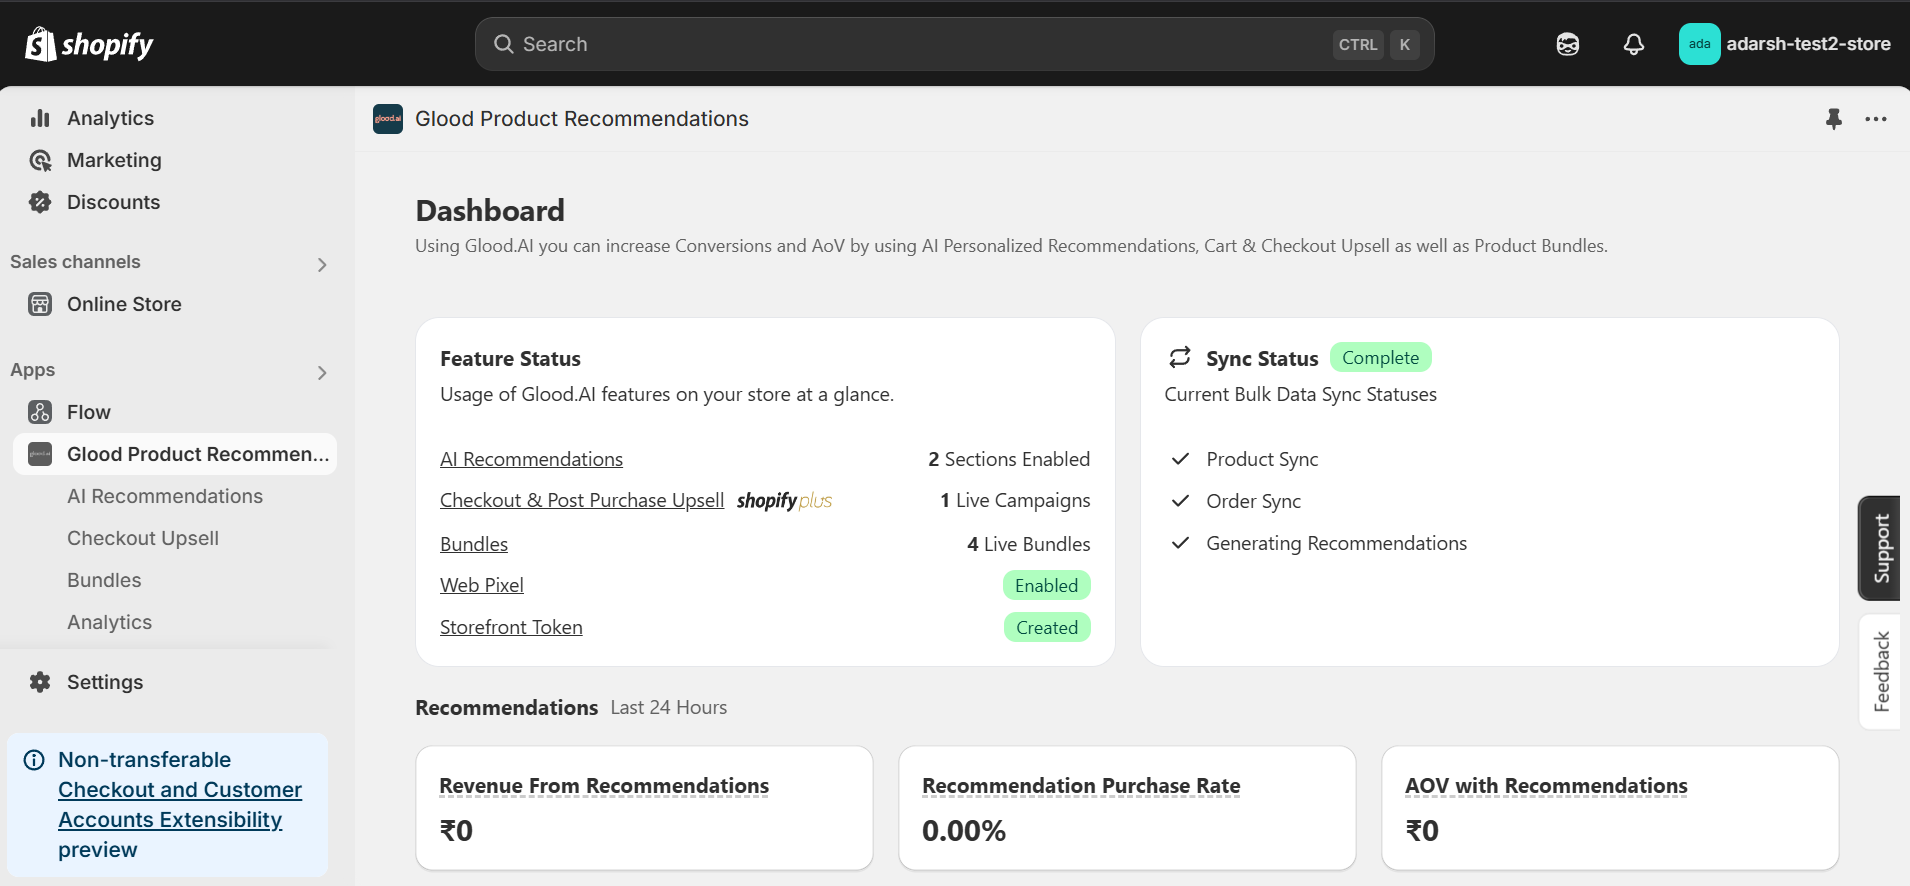
#### 1. Open the "Glood Product Recommendations" app in your Glood.AI admin
 #### 2. Click on the "AI Recommendations" section from the app menu
→ This will open the AI Recommendations Setup screen, where you can create and manage personalized product recommendation sections powered by AI.
#### 2. Click on the "AI Recommendations" section from the app menu
→ This will open the AI Recommendations Setup screen, where you can create and manage personalized product recommendation sections powered by AI.
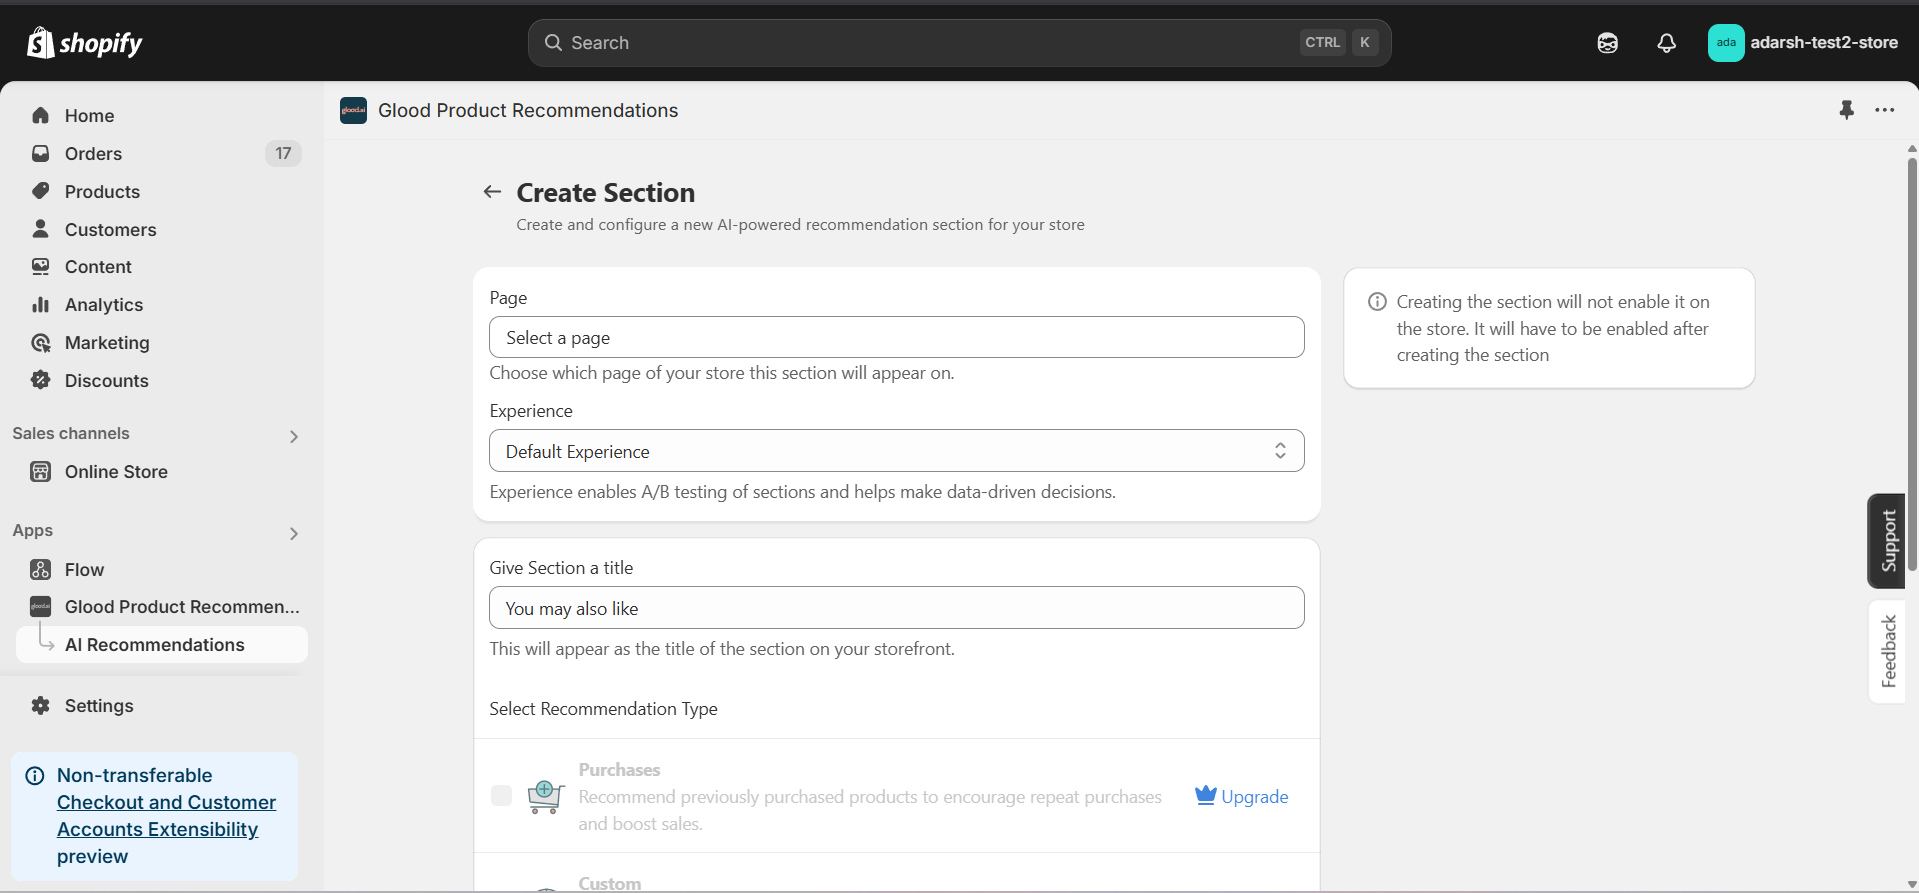
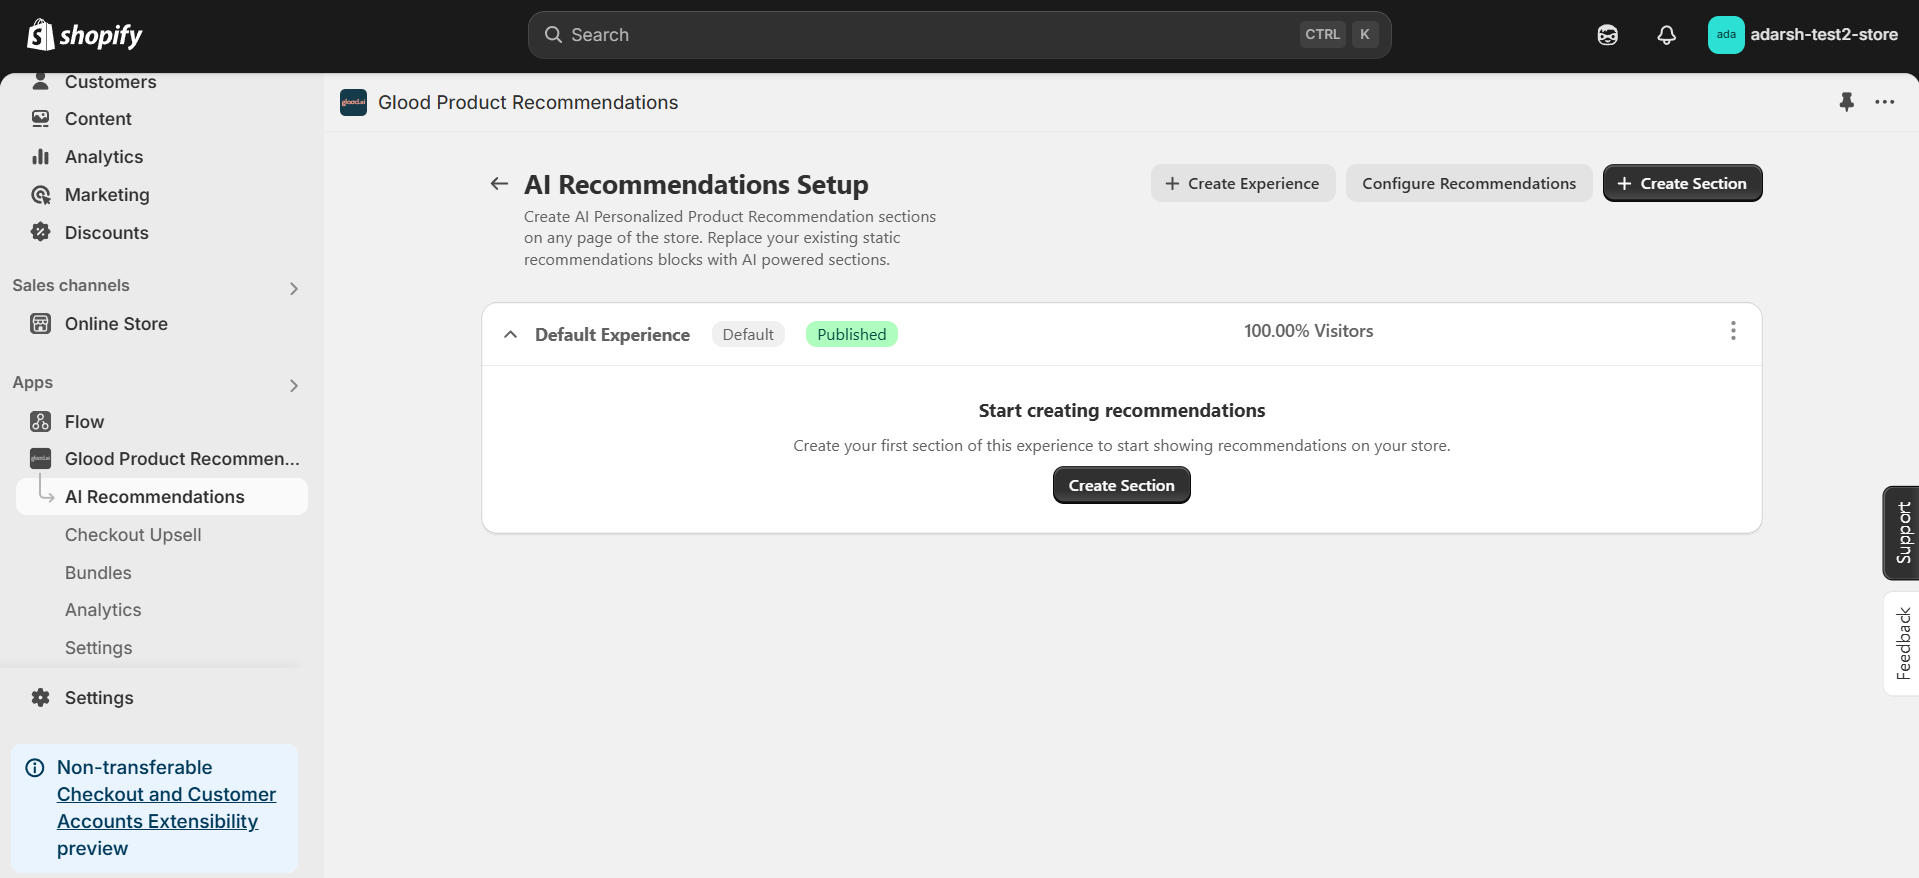 #### 3. Click on the "Create Section" button on the top-right corner
* This will open the Create AI Recommendation Section screen
* Select the page where you want to display the section
* Choose the experience type and give the section a title (e.g., Trending Products)
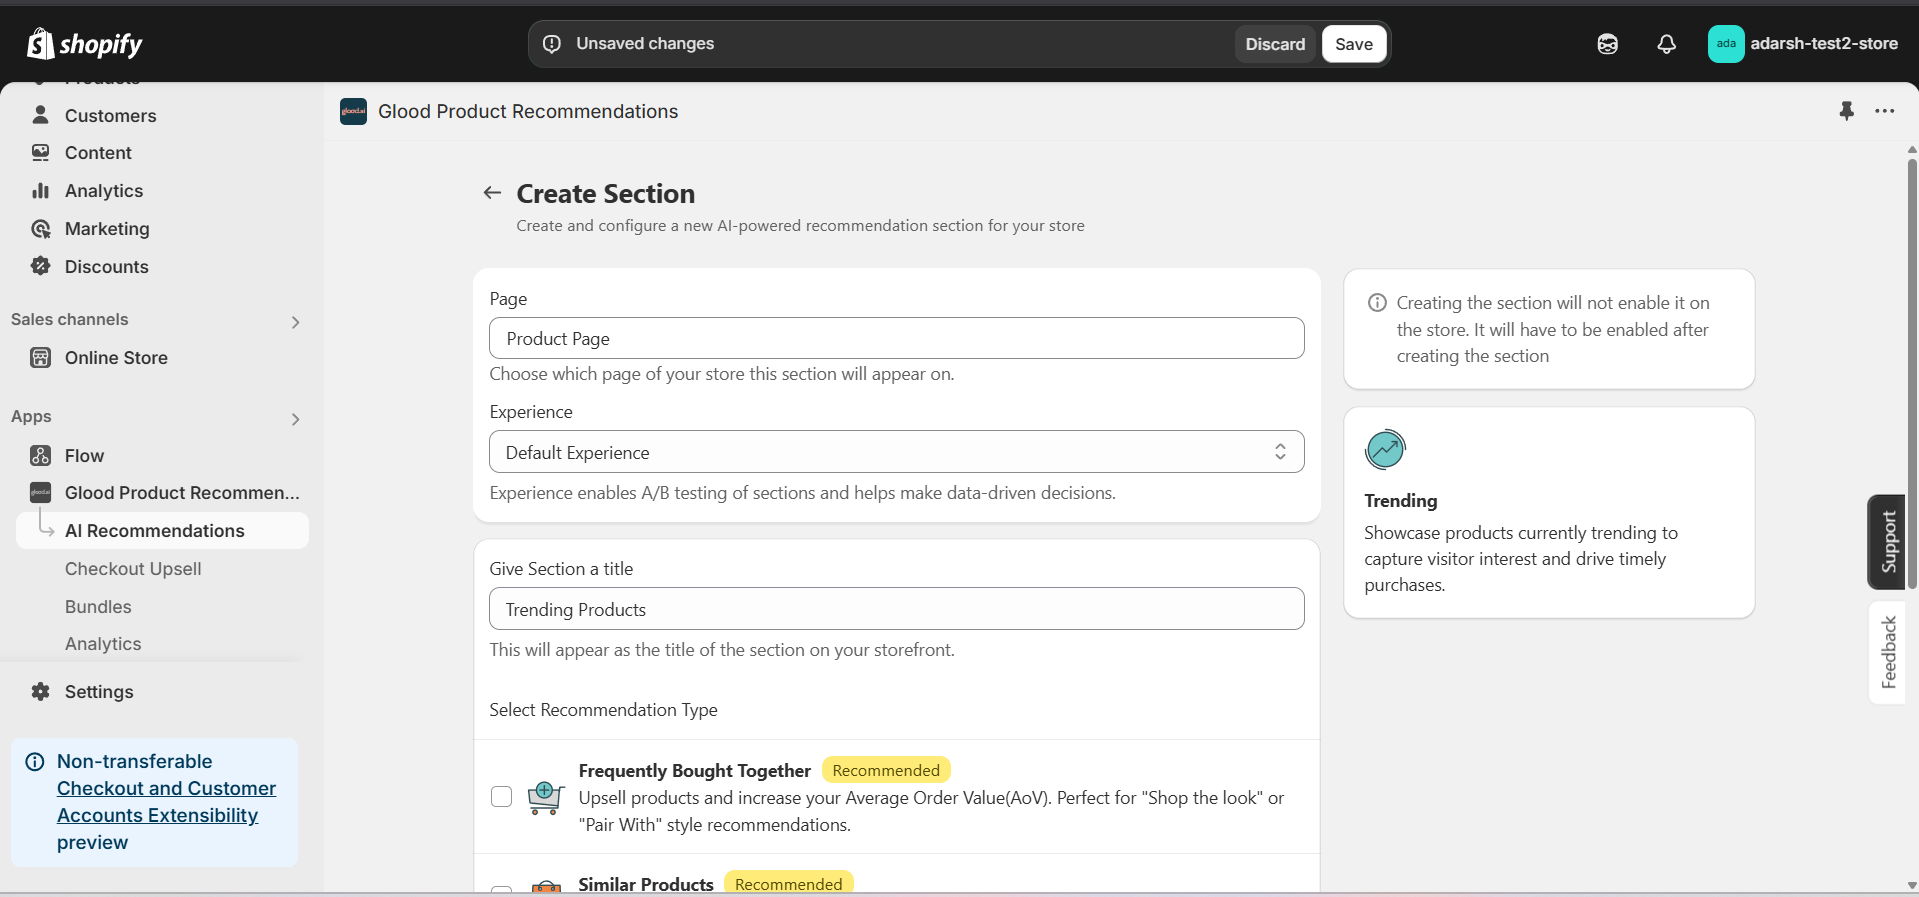
* Under **Select Recommendation Type**, choose **Trending** to display products that are currently popular
#### 3. Click on the "Create Section" button on the top-right corner
* This will open the Create AI Recommendation Section screen
* Select the page where you want to display the section
* Choose the experience type and give the section a title (e.g., Trending Products)
* Under **Select Recommendation Type**, choose **Trending** to display products that are currently popular
 #### 4. Click on the Save button to create the section
* After selecting Trending as your recommendation type and filling out the necessary details, click on the Save button
* This will create the section and open the section detail page
* **Note:** The section is disabled by default until you enable it
#### 4. Click on the Save button to create the section
* After selecting Trending as your recommendation type and filling out the necessary details, click on the Save button
* This will create the section and open the section detail page
* **Note:** The section is disabled by default until you enable it
 #### 5. Configure Your Section (Section Detail Page)
→ Once saved, you'll be redirected to the Section Detail Page:
#### 5. Configure Your Section (Section Detail Page)
→ Once saved, you'll be redirected to the Section Detail Page:
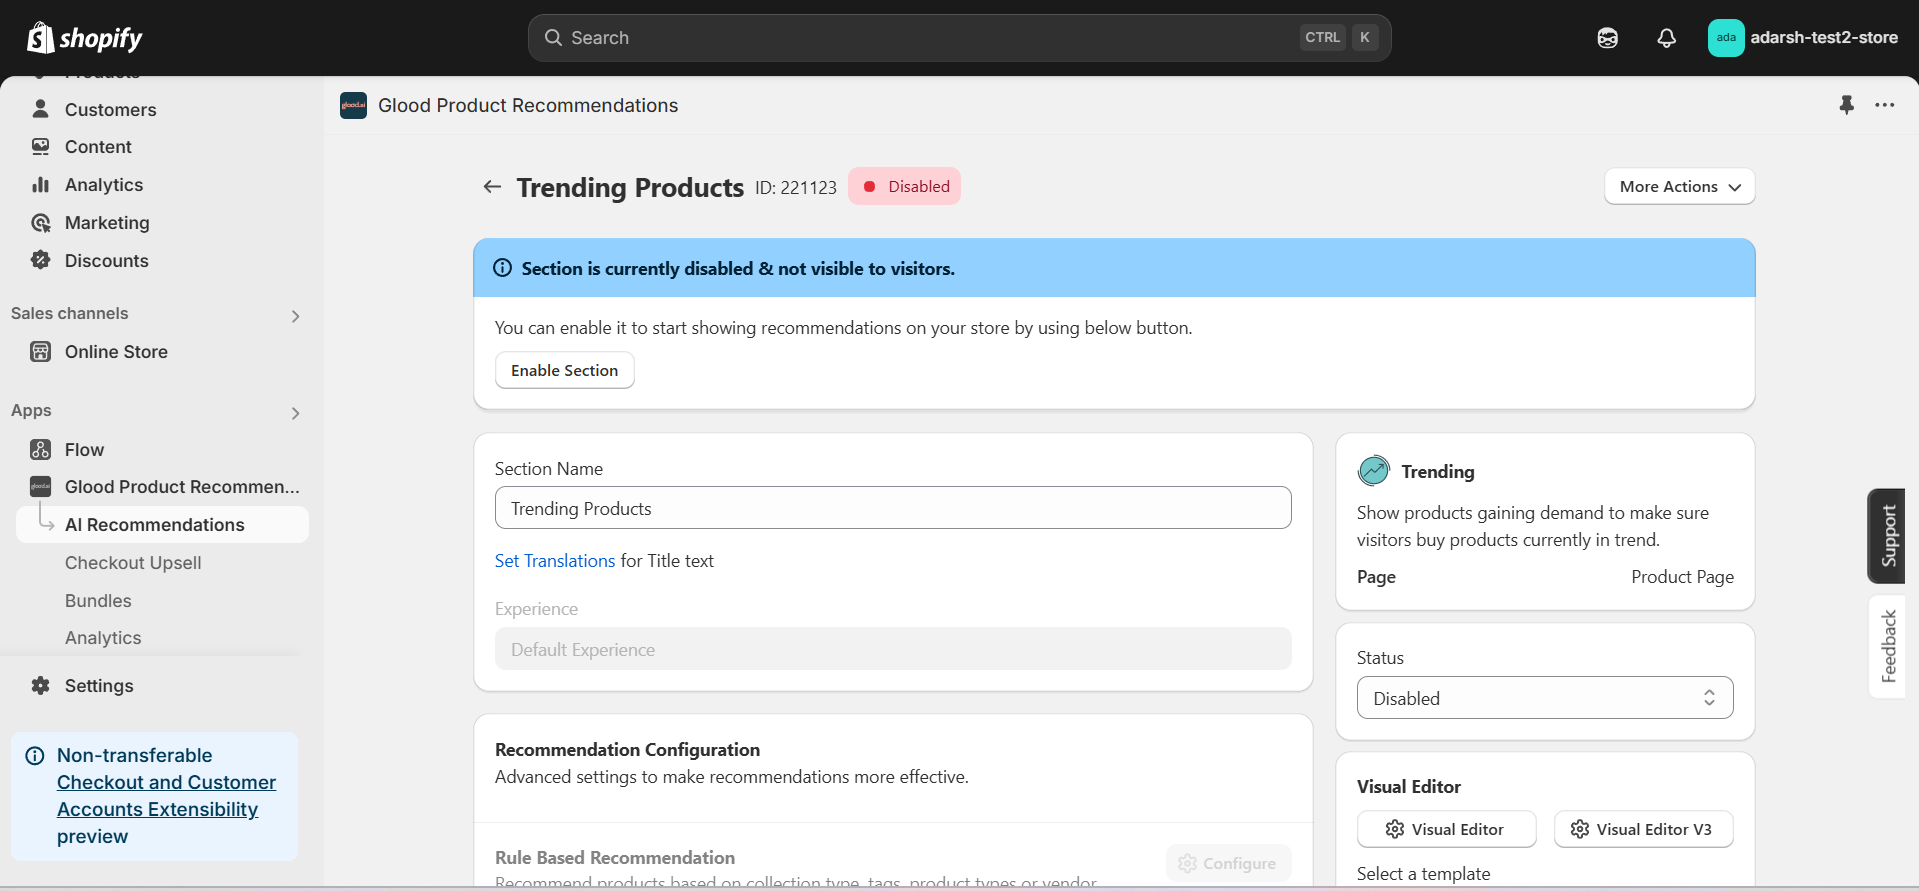 → Enable your section by clicking on the enable section button.
Here are the key configuration options available:
**→ Basic Info**
* **Section Name:** Customize the name of your section
* **Set Translations:** Add translations for different languages
**→ Recommendation Configuration**
* **Show Sold Out Items as Recommendations:** If enabled, even out-of-stock items may appear in the suggestion list.
**→ Location & Position**
* Choose where to show the section on your Shopify store:
* Enter a div ID, class selector or xPath to specify the location (default: #shopify-section-product-template)
* Set the position number to control where the section appears within that location (1 = first section)
* Use breakpoint-based configuration for granular control across different screen sizes
* For direct theme code placement, copy the provided widget code snippet
* Optional: Enable "Require app block placement" to control section display in storefront
**→ Advanced Configuration Settings**
Configure additional settings:
**1. Product Ranking Criteria**
* Choose how recommended products should be ranked and ordered
* Options include:
* No criteria (default)
* Bestsellers first
* Price (high to low)
* Price (low to high)
* New products first
* Personalized for viewer
* Random
**2. Fallback Criteria**
* Define what happens when primary recommendations aren't available
* Options include:
* Random (default)
* Best sellers
* No criteria
* Trending
**3. Price Range Limits**
* **Minimum Price:** Set a floor price for displayed products
* **Maximum Price:** Set a ceiling price for displayed products
**→ Status Section**
* Control whether this recommendation section is active or inactive on your store
* Simple toggle switch to enable/disable the section
**→ Visual Editor**
* Choose between Visual Editor or Visual Editor V3 for customizing your section's appearance
* Select a template:
* For stores with v2 templates, only Visual Editor will be visible
* For stores with v3 templates, both Visual Editor and Visual Editor V3 will be visible
* Make changes to your section's appearance by clicking the Visual Editor or Visual Editor V3 button based on your assigned template
* Customize layout, styling and content through the editor interface
* Configure template-specific settings by clicking the "Click Here" link
* Select a default layout style:
* Carousel
* Horizontal Grid
* Choose layout style for different screen sizes:
* Small screens (mobile): Select Carousel or Horizontal Grid
* Medium screens (tablet): Select Carousel or Horizontal Grid
* Large screens (desktop): Select Carousel or Horizontal Grid
**→ Segmentation**
* Control which visitors see this recommendation section
* Available targeting options:
* All visitors (default)
* First-time visitors
* Returning visitors
* Buyers
* Is customer
* Is not customer
* Helps create personalized experiences for different user segments
#### 6. Preview and Test Your Section
→ After configuration, preview and test the section to ensure it works as expected:
## Support
If you need help with setting up or customizing Trending sections, contact our support team at [support@glood.ai](mailto:support@glood.ai)
→ Enable your section by clicking on the enable section button.
Here are the key configuration options available:
**→ Basic Info**
* **Section Name:** Customize the name of your section
* **Set Translations:** Add translations for different languages
**→ Recommendation Configuration**
* **Show Sold Out Items as Recommendations:** If enabled, even out-of-stock items may appear in the suggestion list.
**→ Location & Position**
* Choose where to show the section on your Shopify store:
* Enter a div ID, class selector or xPath to specify the location (default: #shopify-section-product-template)
* Set the position number to control where the section appears within that location (1 = first section)
* Use breakpoint-based configuration for granular control across different screen sizes
* For direct theme code placement, copy the provided widget code snippet
* Optional: Enable "Require app block placement" to control section display in storefront
**→ Advanced Configuration Settings**
Configure additional settings:
**1. Product Ranking Criteria**
* Choose how recommended products should be ranked and ordered
* Options include:
* No criteria (default)
* Bestsellers first
* Price (high to low)
* Price (low to high)
* New products first
* Personalized for viewer
* Random
**2. Fallback Criteria**
* Define what happens when primary recommendations aren't available
* Options include:
* Random (default)
* Best sellers
* No criteria
* Trending
**3. Price Range Limits**
* **Minimum Price:** Set a floor price for displayed products
* **Maximum Price:** Set a ceiling price for displayed products
**→ Status Section**
* Control whether this recommendation section is active or inactive on your store
* Simple toggle switch to enable/disable the section
**→ Visual Editor**
* Choose between Visual Editor or Visual Editor V3 for customizing your section's appearance
* Select a template:
* For stores with v2 templates, only Visual Editor will be visible
* For stores with v3 templates, both Visual Editor and Visual Editor V3 will be visible
* Make changes to your section's appearance by clicking the Visual Editor or Visual Editor V3 button based on your assigned template
* Customize layout, styling and content through the editor interface
* Configure template-specific settings by clicking the "Click Here" link
* Select a default layout style:
* Carousel
* Horizontal Grid
* Choose layout style for different screen sizes:
* Small screens (mobile): Select Carousel or Horizontal Grid
* Medium screens (tablet): Select Carousel or Horizontal Grid
* Large screens (desktop): Select Carousel or Horizontal Grid
**→ Segmentation**
* Control which visitors see this recommendation section
* Available targeting options:
* All visitors (default)
* First-time visitors
* Returning visitors
* Buyers
* Is customer
* Is not customer
* Helps create personalized experiences for different user segments
#### 6. Preview and Test Your Section
→ After configuration, preview and test the section to ensure it works as expected:
## Support
If you need help with setting up or customizing Trending sections, contact our support team at [support@glood.ai](mailto:support@glood.ai)